Wednesday, April 22, 2020

MUSIC STANDS!

Music Stands!

Today, I thought I would explore something fairly simple and easy to talk about: music stands! These are so ubiquitous that it hardly seems worth mentioning. However, having the right equipment can make practicing and playing that much easier and even convenient! And when it’s easy to play, you play and practice more. Let’s take a look!

The Manhasset Model 48


Here it is folks, the Cadillac, the standard by which all others are judged. Seen across the land in band and orchestra rooms nationwide, the Manhasset 48 is what we all learned to play on. There are lots of things this stand taught us:
Pencil writing is visible on the desk itself!
You can cross out various letters in the brand name to spell a dirty word!
It can rise or sink magically, while you are performing.
It wobbles, but you can fix that easily by tightening the greasy nut at the bottom
The metal shop is capable of welding broken stands back together for another 20 years of service!

Seriously, it’s a great stand if it’s taken care of. It’s also perfect for home use, if you have the space. Standing at attention with your music ready to play at all times (and with your instrument stored on a stand as well), it only takes seconds before you are playing. Excellent for spontaneous performances! But, it’s not very portable, and that leads us to:

The PortaStand Minstrel


Seriously. I LOVE this stand. It has a solid desk that holds all of your music and pencils, but the base folds into a nice portable package that is easy to tote around. Once set up, it accommodates heights from super low (think saxes in the jazz band) to tabletops, to standing. It looks professional too! Highly recommend, and you can find more info here: https://portastand.com/

Heavy-Duty Wire Stand


This type of stand is available from several manufacturers, but the gold standard is from K&M. This provides the best combination of stability and ultra-portability. It folds down completely so it will fit into a (large) backpack, but it can be wobbly, and there are literally instructions on the internet showing you how to open  and close it. The desk is open, meaning things can slip through it, and flimsy paper has a hard time standing up and may need to be clipped into place. Available in many colors, it’s a great choice if you are on the go a lot, and need to economize. See the K&M version here: https://www.k-m.de/en/products/music-stands/music-stands-with-collapsible-desk/101-music-stand-black

The basic wire stand


This music stand is available from MANY places and brands, and usually costs less than $15. The main advantage here is price: It’s cheap. It accomplishes the task of putting music a the right height for practice, but it very limited in how it can be adjusted. It also becomes extremely unstable if it is disturbed in the slightest. Super-portable, it breaks down into a very small package so that students can take it back and forth to school if necessary. It serves it’s purpose well, but an upgrade to any of the above stands will provide an immediate and noticeable improvement in quality an usability.
All of that said….ANY of these stand is better than no stand at all! Trying to play with music spread out on a bed or table will promote terrible posture, and having it on a piano will be too far away to be able to read. It is critical for all musicians to have a music stand available to them where they practice!


Which stand is your favorite!!?


Tuesday, April 14, 2020

Recruiting in difficult times


Recruiting

It’s an intimidating process, and can be difficult (or at least logistically challenging) in the best of times! Now, with everything closed and most folks under some kind of mandate to stay at home, recruiting will be that much harder.

But it is STILL a critical part of your program. Hope springs eternal that school will start normally this fall, and when it does, orchestra will be there. The question is: will there be any students to fill those seats in your beginning strings class. One thing that I have learned after many years of doing this, is that it won’t happen just by luck, or the fact that you are a fantastic teacher, or that their parents/brother/crazy uncle plays the violin. YOU will have to put in the effort to get those kids, and this year, you will have to be extra creative!

I have done instrumental recruiting in one form or another for over 20 years, at many schools, mostly in the Tidewater, VA area. During that time I have learned many things that work well, and some others that don’t! When you boil it all down, a successful recruiting campaign consists of three main components:

(1)    A successful in-person demonstration of the instruments, with flair, personality, and music that younger students will recognize.
(2)    Solid communication between the recruiting and an upcoming parent meeting to ensure high attendance and enthusiasm!
(3)    A parent meeting during which:
a.       you can speak to parents about the expectations of you and your program
b.       Parents and student can inspect instruments
c.       Students can register for strings, and in some cases:
d.       Rent an instrument to be delivered in the fall
As I mentioned earlier, this is a time-consuming process that requires careful attention and planning under normal circumstances!
I have put together a guide to help a director with no experience in recruiting carry out a successful program, and you can take a look at it here:

It is the product of many years of knowledge, and I am happy to share it with you! It has a “bare-bones” look to it, and I am in the process of revamping and redesigning it. However, the “meat” is all there, and I am sure you will find it useful!

The guide consists of six large steps:

(1)    Choose your schools, and set your dates
(2)    Confirm dates, Confirm performers
(3)    Gather materials, Reconfirm dates
(4)    Rehearse presentation
(5)    Student presentation
(6)    Parent meeting: class registration and instrument rentals.

Well, as we all know, these are anything but normal circumstances! With all of the restrictions in place, we must now convert this very successful, in-person model to one that can be accomplished online. Here is one way that I think this could be accomplished:

Six NEW steps:

(1)    Choose a platform that will allow you to be successful
a.       Google Meet and Zoom allow multiple “windows”
                                                               i.      Check with admin / school district policies
b.       Choose schools and set dates for virtual recruiting
c.       Coordinate with ES principals
d.       Coordinate with ES music teachers
                                                               i.      They are LOOKING for lesson plans at the moment. You may be their savior! 😊
e.       Find time when you can the es music teacher can present together
(2)    Find student performers who may be able to help demonstrate instruments
(3)    Gather your materials and make sure everything works!
a.       Software
b.       Instruments
c.       Reconfirm dates
(4)    Rehearse the presentation
a.       Use a script, and PRACTICE a couple of times so that you are comfortable doing this in front of the camera! Remember, this is salesmanship!
(5)    Host a virtual presentation for your prospective students! Remember to integrate your student performers, and HAVE FUN! Enthusiasm is contagious here!!
(6)    Host a virtual parent meeting, with virtual registration
a.       Send registrations to admin/guidance
b.       Work with music dealer to secure rentals
c.       Pick delivery date for instruments

I STRONGLY recommend enlisting the help of your local school-music dealer to assist in this process, if you aren’t already! They are the local PROS at recruiting, and will be able to provide you with additional resources to help you out. If you are relatively new to your district, they will know all of the inside tricks and procedures that are unique to your location, and know how to work around them. They are INVALUABLE!

In the next few days I will be putting out more information regarding recruiting, so stay tuned!

Thanks!

Chris, at home


Wednesday, April 8, 2020


Good afternoon musicians!

As we are all sitting inside our houses, I am CERTAIN that many of you have decided that NOW is the time to practice, practice, practice! There is no better time to get some more literature under your belt, prepare your scales for the next district or state audition that comes up, or just keep your chops loose and maintain your skills!

As such, I thought it would be a good idea to share some basic maintenance and repair tips to keep your stringed instrument in top playing condition. Proper maintenance and care will allow your instrument to perform at its best, and will prevent unnecessary trips to the repair shop (which is good, because they are all closed right now!).

Storage

Let’s start with storage of the instrument. If you are not going to play for a while, the best and safest place to keep your instrument is in its case. The case is designed to protect the instrument against moderate bumps and knocks and will keep the instrument in great shape. It is very important to keep the following points in mind regarding your case:

  •          Make sure your case is the right size for your instrument. Storing a 3/4 violin in a case meant for a full size instrument, or keeping a violin in a case meant for a large viola is just asking for trouble. The case must fit the instrument snugly to prevent extra movement. If you bought your instrument as an outfit at a music store, this shouldn’t be an issue. However (unlike band instruments) string instruments are often purchased separately from their case. Make sure your instrument and case are “made for each other!”
  •          Remember that your case is meant for your instrument, bow, and specific accessories ONLY! Many cases (such as the plastic, shaped case that many beginner instruments arrive in) are designed to hold ONLY the instrument, bow, and a cake of rosin. Here is an example of such a case:
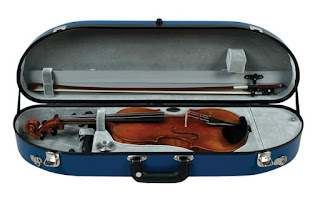
  •          Some cases have an additional spot to store a shoulder rest. Still others (like larger oblong cases) provide space for all of those accessories, plus a pocket for music, cell phones, etc. Here are a couple of examples of these cases:

  •          Whatever case you have, ONLY store in it what it was designed for. Because the case was designed to protect your instrument, forcing other items inside will inevitably damage it. We have seen cases where music books, clothes, you name it, were forced into a case, and caused damage. The damage can be a simple as scratches in the finish, breaking the bridge, or causing dents and cracks in the top of the instrument. PLEASE: only your instrument in the case!

This article from Strings Magazine also provides good guidance for choosing a case: https://stringsmagazine.com/the-violin-case-buyers-guide/

If you will be practicing your instrument a lot (and we all hope that’s the case!), then a stand or hook might make sense in your practice area at home. There are lots of good choices, but my favorite are the Ingles stands. They are made for violin, viola, cello and bass, are very sturdy, and very stable. In addition it features a “lock” to hold the instrument in place, as well as hook for your bow. This makes it very easy to simply pick up your instrument and start playing. Here is what it looks like:


For violins and violas, wall hooks are available, and even a hook that will mount to a music stand! Beware of pets and smaller siblings, but if you have a secure area to practice, a stand or hook is an excellent way to keep your instrument at arm’s reach.


Store the instrument indoors, in a temperature-controlled environment. While extremes in heat/cold and dry/humid conditions can damage wooden instruments, what is really damaging is rapid and/or repeated changes in these conditions. If your school orchestra room is kept very cold, and your home is relatively warm, you probably won’t experience too many issues as you bring the instrument back and forth. This is because the changes are gradual, and the instrument has time to adapt. Try to avoid keeping your instrument in a cold car trunk, or warm garage. As long as you keep your instrument with you, you will avoid many of these issues.

Handling and Transportation


Handling of your instrument is pretty straightforward. Be careful with it, but don’t be afraid to treat and use it as a musical instrument. When not being played, it should be in rest position. Don’t balance it on a music stand or chair. If you need to leave your practice/rehearsal space, place the instrument on a stand or in its case.

Transporting the instrument is similarly easy: try to keep the instrument in the same environment that you will be in. If you are in a car on a very hot or cold day, keep the instrument in the passenger compartment or other climate-controlled part of the vehicle. Cellos and basses may be laid flat, but can also be transported upright if the case is secured. When securing a case to a vehicle, take care not to put straps around the instrument, stressing the strings and bridge. It is best to secure the case to the vehicle with straps, and make sure the instrument is secure in the case. 

When shipping instruments, pack the instrument securely in its case, secure the bridge and scroll, then pack the case in a sturdy carton large enough for fill/padding on all six sides. Tape securely, and ship with a reputable shipper. Robertson & Sons Violin Shop (http://www.robertsonviolins.com/) does this as a matter of course, and they have an excellent video here showing how to ship your violin safely: https://www.youtube.com/watch?v=dViKEekWDXg

Maintenance

There are very few true do-it-yourself repairs that can be done correctly without special training, but basic maintenance is relatively simple, and will prevent the need for many repairs. Let’s take a look at a few:

·        Let’s start with the basics: the strings. The instrument should be strung properly, with proper tension. The string should sit securely in the groove meant for it on both the bridge and the nut, and should be coiled around the peg neatly. The strings should NOT cross each other in the pegbox.The strings should be cleaned of excess rosin after playing. This can be accomplished simply by rubbing them with a clean untreated cloth until the rosin is removed. Leaving the rosin to build up on the string will deaden the sound, and lessen the useful life of the string. Strings should be changed one at a time! Removing all of the strings at the same time will result in the bridge, and probably the soundpost falling as all of the tension is removed. This article from Violin Restorer has good instructions and pictures to help you out: https://www.violinrestorer.com/2017/03/06/change-strings-violin/

  • ·       
    The bridge[CD9]  is custom cut and fit to your instrument. It cannot be swapped with another, and you cannot buy one “ready made” at a store. (More on this below) If the bridge is knocked out of place, or falls, you can reset it yourself. It should be stood up in the center of the instrument, the feet of the bridge aligned with the notches in the F-holes. There should be no space between the feet and the top. When in doubt, take the instrument to a repair shop for proper placement.

  • ·     
     
     Pegs must fit the instrument exactly. Pegs must be cut to fit your instrument[CD10]  by a luthier: they cannot be purchased off-the-shelf ready to use. The peg is tapered: thinner at the end, and gradually growing thicker down its length. The peg box holes must be similarly tapered. This taper is what allows the peg to “lock” in place after tuning, yet remain adjustable by hand. The peg should be clean and turn easily when adjusted. If there is difficulty in turning the peg, a SMALL amount of “peg dope” can be applied to the peg before it is reinserted. The secret ingredient used in our shop? Lava soap! Use a SMALL amount, just enough to lubricate the peg. Remember, it’s easy to add a little more, but darn near impossible to remove it! NEVER force a peg that will not turn, and NEVER let Dad near it with his pliers! The locking power of the taper is considerable, and the peg or worse, the peg box or neck will break before the locked peg will. If a peg is hopelessly stuck. Take it to your local repair shop and leave it to a pro!
  • ·       The chinrest is a personal choice. Several different types exist, and one should be chosen that is comfortable for you. The chinrest[CD11]  may be removed fairly easily by using a special “key” on the barrel screws. Insert the key into the hole, and turn the barrel counterclockwise to loosen and remove. Do not push the key too far in, or it may emerge from the other side and scratch/damage the finish as you turn it. For this reason, we don’t recommend using a paperclip (though it will fit!) for this purpose.
  • ·         The tailpiece is made of plastic, wood, or other composite material. It usually has spaces for 1 to 4 fine tuners, or it may have the fine-tuners built in. When all of the strings are removed, the tailpiece can be removed by slipping it over the end button. However, because this involves removal of all of the strings, and proper adjustment of the tailgut (to make sure the tailpiece ends up in the right place!), we recommend that you leave this job to a professional.
  • ·         The neck, fingerboard, and nut require very little maintenance, with the exception of removing rosin from the fingerboard after playing. If done immediately after playing, this can be accomplished with a clean cloth at the same time you clean the strings. If you are a newer player, and your instructor wants you to use tapes or other markers on the fingerboard, there are several commercial solutions available. Additionally, pinstripe tape (found at auto supply stores) is the traditional standby, as are paper hole “reinforcements” or other stickers. Your instructor should install these so that they are in the correct place. Upon removal, cleaning of the glue from the fingerboard is necessary. A citrus-based solvent, such as “Goo Gone” will work to do this. However, care must be taken to not get any on the instrument itself, as it may damage the finish.
  • ·         The finish of the instrument can be kept in top shape with care and careful handling. After playing, excess rosin should be wiped off of the instrument with a clean cloth. NEVER use any alcohol-based solvents on your instrument: it will strip the finish/varnish from the wood. There are commercially available polishes available at your music store. These should be used VERY sparingly to spot clean areas of the instrument. You should never slather your instrument in polish. It’s not like waxing a car!
  • ·        
    The bow should be handled carefully, and not whacked against objects, nor dropped. The stick can be quite fragile, and if it is broken there is no repairing it: it must be replaced. Always loosen the bow hair after playing, and don’t touch the hair with your fingers: oils from your skin will both attract dirt and grime, and[CD12]  damage the hair. If a hair (or more!) break while playing, simply CUT them near the end with a small scissors. Do NOT rip them out. Each time you do this, you loosen ALL of the hair at that end of the bow, which will necessitate a complete rehairing sooner. This article from our friends at The Long Island Violin Shop goes into detail on the subject: https://www.liviolinshop.com/blogs/the-long-island-violin-shop-blog/knowing-when-its-time-to-rehair-your-bow

Repairs

All of the repairs in this section MUST be done by a professional: a trained luthier with experience working on and with stringed instruments.

  • ·         Bow rehair. This is a very simple job for an accomplished luthier to perform. The cost is usually reasonable, and can be completed fairly quickly. When your bow hair is dirty, worn out, or falling out, it’s time for a rehair!
  • ·         Soundpost reset. The soundpost is held in place by the tension of the instrument only: no glue! It must be cut to the proper length by hand, and the cuts must be angled to match the contours of your instrument exactly. It must then be inserted in the proper place near the treble foot of the bridge, by inserting it thru the F-hole. It’s a tricky operation, one that is very difficult for a novice to get correct. You will be astounded how quickly a trained luthier can do this job!
  • ·         Bridge fit and/or replacement. As mentioned earlier, placing a properly cut bridge isn’t too difficult, and can be done with practice. However, if your bridge breaks or needs replacing, this job MUST be done by a trained luthier. The reason is pretty simple: no two bridges are alike, because no two violins are alike. The contours of the top of your instrument are unique. In order for proper sound/vibration transmission to take place, the feet of the bridge must match the contours of the top exactly. A luthier will cut/sand your bridge to ensure proper fit. In addition, string height is unique from instrument to instrument, and this is determined by the bridge as well. A luthier will cut and shape your bridge to get the proper height. We cannot overstate this: a bridge MUST be done by a luthier. There is no such thing as an off-the-shelf, standard bridge that you can purchase and fit yourself.


We hope that this article has been helpful! If you have anything to add and/or comment on, please visit our Facebook pages and let us know!

Happy playing!

Chris, at home.


Tuesday, April 7, 2020

Keep on social distancing!


Germantown Violin Co in 2020


Wow…these are unusual times.


As I write this message, I very much hope that this note finds you, your families, students, staffs, friends and THEIR families doing well during these unusual times. The Coronavirus/COVID-19 pandemic has impacted all our lives in ways we couldn’t really imagine not even four weeks ago, and it looks like we need to settle in for the long haul over the next couple of months.

I wanted to let you know that we at Germantown Violin Co are taking all necessary precautions to limit the spread of the Coronavirus. We are a small office and there is very little risk of any of us becoming exposed at our place of business in Maryland. We continue to be available to all of our customers and friends via phone and email. As factories reopen and begin to ship again, our capabilities will likewise increase. Of course, situations may change, and we will keep you informed as soon as we are aware of any changes.

One of my favorite parts of my role at GVC is getting “on the road” to visit your stores and schools to learn more about how we can work together as a team. It is killing me to not be able to see all of you in person! As soon as it is reasonable to do so, I will get on the road again! In the meantime, I hope we can put technology to work for us to continue meeting face-to-face via platforms like Zoom, Skype, and Google Meet.

Finally, PLEASE let us know if there is anything that we can do to assist you. Our capabilities are fairly specific and limited, but we will share what we have. This is new territory for all of us, and we are learning as we go. Our top priority, as many others have said, is the health and safety of our associates, dealer-partners, and their customers. Tied for a close second is running a successful stringed-instrument business while promoting music education, and we couldn’t do that without all of you.

Thank you very much for your continued support and business!

With gratitude,


Chris Davis, in my home office in Haymarket, VA


facebook
twitter
linkedin
instagram

Chris Davis

National Marketing Director
Germantown Violin Company
(757) 287-4000
chris.davis@germantownviolincompany.com
www.germantownviolinllc.com
19200 F Chennault Way, Gaithersburg, Maryland 20879
Learn More About Us Here!