Thursday, August 20, 2020

Oh $#&%! my bridge fell down!

“My bridge fell off!!”


This exclamation could be heard from nearly any beginning string player from coast to coast. It’s usually accompanied with a tone of sheer terror: the student is convinced that they have irreparably damaged the very valuable instrument that they have been told several times is “very expensive!”

Turns out, this really is not that big a deal. It often happens when a student has loosened all four of the strings on their instrument, and discover that in fact, the bridge is NOT glued on! As long as the bridge is intact: no cracks or chips, no missing parts, it can usually be stood back up with very few problems.


First take a close look at the bridge: There is usually printing on one side, and this lettering should be visible to the player when the instrument is held in playing position. You should notice that the curvature of the bridge is not symmetrical: the right-hand side is much lower than the left-hand side. This will help in the orientation of the bridge: the thin “E” string is on the lower side, while the thickest “G” string is on the highest. If the bridge is damaged or cracked, STOP. It is time to head to your repair shop for a proper repair.

Second, take a close look at the instrument. The soundpost inside the instrument should still be standing. It sometimes falls, because the release of all of the string tension will allow the top and back to expand, and the post will fall. If the soundpost is down, STOP. Head to your repair shop!

Continuing with the instrument, take a close look at the top. Are there any cracks or warps that may have caused the bridge to slip and fall? If so, STOP. Off to the shop you go!

Assuming that everything is A-OK to this point, look at the two “F” holes in the top of the instrument. Notice the two small “notches” in each hole. These are directly across from each other and create the line that the bridge will rest on. There may also be small marks in the finish that will also show you where the bridge should go.

So, loosen the strings (but do not remove them!) so that you have enough room to stand the bridge up. Holding the bridge with one hand, turn the pegs so that there is enough tension to hold the bridge in place without it falling. Don’t worry about the exact position of the bridge just yet. Now apply tension to the other three strings.

By this point, the bridge should be standing unassisted. Take a moment to make sure that it is oriented properly: printing facing the player, and the low side on the right when viewed from the chinrest end of the instrument. Now, gently move the bridge into the correct position: centered on the instrument, and between the notches in the F-holes. Make sure the feet are standing flush on the top of the instrument with NO gaps. Once you have the bridge in the correct position, make sure that each string is seated in the notch designed for it. Now you may tune the instrument to pitch.

If, during the tuning process, the bridge slips and falls, you may reset it and try again. There is tremendous pressure on the feet of the bridge, so it MUST be flush to the top. If it continually slips out, there may be another issue that a luthier will need to adjust. Take it to a reputable shop to have a new bridge cut and fit to the instrument.

A final note: you CANNOT buy a ready-to-play bridge from a music store. Each bridge must be custom fit to the unique curves of your instrument. It is not a hard or costly job, but it is something that only a trained luthier can accomplish. A new bridge is NOT a DIY opportunity!

Now that you are all set…go practice!


Thursday, August 13, 2020

Rosin Explained!

Rosin Explained


“What the heck is rosin anyway?” 

This is a question that many new musicians and their parents may have. If you rented your instrument from a local music store, chances are that you received an “outfit” that includes the instrument, a case, and if you look inside the little pocket inside the case: a small square thingy, either yellow or brown, and often in a wood holder. What is this anyway, and why do I need it?

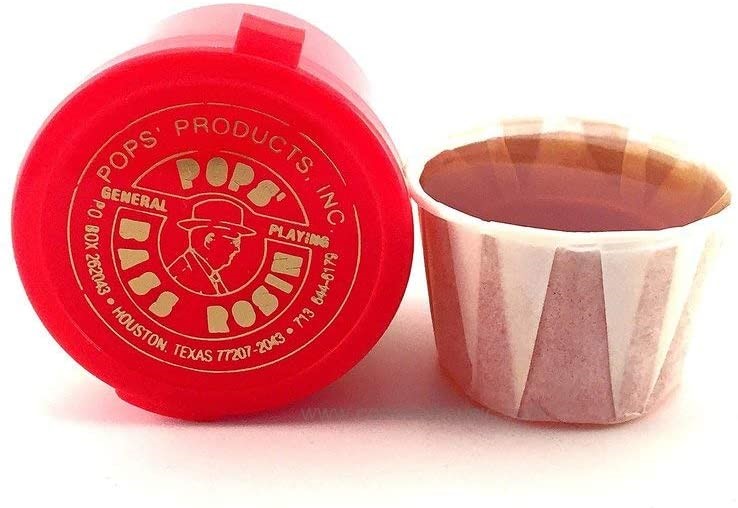
Simply put, rosin is tree sap or resin. It usually comes from pine trees and other conifers. It is heated and then cooled until it becomes solid and develops a rich, colored, glassy look.

Rosin is sticky when warmed. This rosin, once applied to the hair of a bow, is what allows the bow to “grip” the strings of an instrument and set them in motion as the hair is drawn across. This sets the string vibrating and produces the sounds that we are all familiar with.

In fact, if a student opens up their brand new violin and bow, and proceeds to play the instrument without applying rosin to the bow, the bow will simply slide across the strings with no friction at all, and no sound will be produced. It can be very frustrating for a beginner to experience this, as all the excitement of getting a new instrument evaporates when they cannot produce even a squeak!

The solution is simple: apply rosin to the bow hair. To start, the shiny surface of the rosin cake must be roughed up to expose the raw rosin. This can be done with a small piece of sandpaper or a coin scratched across the surface. In a pinch, I have even used a car key!

Then, with tension applied to the bow hair, the musician should simply rub the bow back and forth across the rosin until some of the rosin transfers to the bow hair. This is most easily accomplished by working in thirds: from the frog about 1/3 up the bow, the middle third, and finally from the tip down about a third of the way. A new bow will need a good amount of rosin before it will play as expected.

As the musician plays, rosin wears off the bow, and the dust flies everywhere! The dust should be wiped off the instrument and strings each time the student finishes playing, otherwise it will build up and deaden the sound of the instrument. Fresh rosin will need to be applied to the bow each time it is played, but not in the amount used initially.

Rosin comes in different sizes and colors: dark and light, hard and soft. In all cases the purpose is the same: to provide friction so as to create sound. It is highly recommended that you follow the advice of your instructor in the selection of rosin. (Basses for example typically use a much softer compound than a violin or viola.)

And that’s about it! Take care not to over-rosin the hair, don’t touch the bow hair, and clean the instrument each time it is played.


Now, go practice!


Wednesday, July 22, 2020

How to change your instrument's strings


Changing your instrument’s strings


With so many school systems going to an online/virtual model this fall, nearly all of the routine maintenance of musical instruments will be in the hands of students and their parents. Teachers often take care of small things like tuning the instrument, adjusting the bridge, and when disaster strikes…replacing a broken string!

The truth is, replacing strings is not hard, but there is a procedure that should be followed to make sure it is done correctly, and to make sure that the instrument doesn’t fall apart in the process! I am going to explore changing strings on a violin, but the same basics apply to all four string orchestra instruments.


Know how your instrument is constructed

Many beginners and their parents do not realize that there is no glue holding the bridge up, or the soundpost (inside the instrument) in place. In fact, there isn’t! The entire instrument is held together by the tension of the strings stretched across the top. If all four strings are removed, the bridge will simply fall off the instrument. Worse, with all the tension suddenly gone, the top and back of the instrument will move away from each other, allowing the soundpost inside the instrument to fall. Now you are up a creek: you usually need to take the instrument to a luthier (repair shop) to properly set the soundpost. This mess is easy to avoid: DON’T REMOVE ALL FOUR STRINGS AT THE SAME TIME!


Be prepared

The only equipment you need for this project is a new set of strings. There are no tools required. But, make sure you have the correct strings! Make sure your strings are for the instrument you have. Viola strings will fit on a violin, but it won’t sound right! Also, make sure that you have the correct size strings for your instrument. Finally, see how the strings are packaged. Sometimes they are in individual envelopes that identify the string inside. Other times they are all bundled together, but there is usually a code on the package that tells you which color is which string. Look for it and be prepared!


Study up

Take a moment and note how the strings that are currently on the instrument are wound. You should see that the strings don’t cross from one side of the pegbox to the other, and that the strings are wound neatly around the peg.


Time to start!

I usually start with the “G” string, on the left side as you look at the instrument from the top, scroll facing away from you. Trace the string to the pegbox to see which peg to loosen. (It should be the peg closest to you on the left-hand side.) Turn the peg towards the bridge to loosen the string and unwind the string from the peg. The peg may come out of the hole. That’s OK. Lift the string off of the bridge and slip the ball-end out of the fine-tuner/hole in the tailpiece. That’s it! One string off.


Replacing the string…

As I mentioned above, REPLACE the string you removed BEFORE you remove any more strings. This is critical to keeping the instrument together!!

Take the replacement string out of the envelope and unwind it so it is fully extended. Take the ball-end (so named because there is a little “ball” in a loop at the end of the string!) and carefully slip it into the fork in the fine tuner in the tailpiece. The ball pulling against this fork is what holds the string in place.

Then, pull the string toward the peg box. It’s going to flop around a bit because there is no tension on it yet. That’s OK. If the ball-end slip out as you start winding, just re-insert it. No biggie.

Place the peg into the pegbox, and locate the hole drilled into the peg. (Having a good light here is very helpful, as trying to find a black hole, in a black peg, in the dark pegbox is sometimes challenging!) Insert the string through the hole so that about a ¼” of the string comes out the other side. Then, start winding the string around the peg by turning the peg away from the bridge.

The string should wind tightly around the peg towards the side (not the middle!) of the pegbox. When done, the string should be closer to the side of the pegbox. As you wind, you will need to keep tension on the string with your other hand. As you continue to tighten, make sure that the string crosses the bridge in the groove cut for it. Continue to tighten until there is enough tension that you can tune the string with a tuner. When you reach the desired tension, push the peg firmly into the hole in the pegbox. The peg and the hole are tapered, and this “pushing” action “locks” the peg in place so it won’t turn until you want it to.


Continue with the other three strings

Repeat the above procedure with the other three strings, moving left to right across the instrument and finishing with the “E” string. Again, make sure to change only ONE string at a time! Also, take special care with the “E” string as it is very thin and the most prone to breaking.


Success!!

That’s all there is to it! You have successfully changed your strings! Now get them tuned up, and tune them constantly for the next couple of days. The new strings will stretch, and it will seem like they are ALWAYS flat. As the strings stretch and adjust, this problem will subside.


Now, go practice!


Monday, July 20, 2020

Does instrument size actually matter??

Why does size matter?

I have spent over 20 years in the music industry, and during that time I have worked with countless music educators as they recruit beginners into their band or orchestra programs. One of the biggest differences between string programs and band programs is the size of the instruments. In band programs, it is literally one size fits all. Or more accurately, one size fits most as best as we possibly can when they are in fifth grade! Some students may not be able to play certain instruments at all because of their size!

In the orchestra, instruments come in different sizes to accommodate all different size players. A question I sometimes get is “Does the size of the instrument really make that big of a difference? After all, I have my dad's old violin that he can use, and we don't have to pay to rent another one!”

The short answer is: YES! Correct size is critical when it comes to stringed instruments. With violins and violas instruments range in size from very small to what is typically called full sized. Sizing a child for an instrument is especially important. If the instrument is too large, they will not be able to reach the proper string positions and will have difficulty playing the instrument. If the instrument is too small, their left arm will be folded up tighter than it should be, it will still be difficult to reach the correct positions, and fatigue and discomfort will set in quickly. Both will discourage a smaller player from practicing their instrument. Learning a new instrument is difficult enough already, adding these additional complicating factors just makes it that much more difficult.

“But how do we know what size instrument we need?” parents often ask. This is can be a simple to answer. Your child’s string teacher has the skills to measure your child to make sure that they get the correct size instrument. Often, teachers will hold events at the school, and will measure their child at that time so that when it is time to get their instrument, they already know exactly what size they need.

It is always important to rent your instruments from a reputable music dealer, but especially so with stringed instruments. Most major retailers offer rental programs, and when it comes to stringed instruments, exchange programs as well. This way, your child can rent a smaller instrument that fits them properly, and when it comes time for them to move up to a larger instrument, they can exchange it with no difficulty. This allows your student to have the correct size instrument throughout their career, without tying up unnecessary funds.

But what if you are in a situation where your teacher can't get you measured, and you're nowhere near a music store to measure your instrument properly. Measuring a child for an instrument is something that you can do yourself, if you take your time and make sure that you do it properly. The first step is to determine how long your child's left arm is in inches. Using a yardstick, place one end of the yardstick at your child's neck, and lay it flat against the inside of their arm such that it crosses the center of their palm with their hand outstretched. Note the measurement in inches in the center of their palm.

Then, using the chart below (thanks to Yamaha.com), determine what size violin or Viola your child needs. Assuming that you were measuring your child yourself because you are not near a music store where you can get this done by a professional, you can then order the proper sized instrument.  If the number is right on the boundary, it is usually OK to go with the larger of the two sizes, but make sure to check with your teacher! 

When your instrument arrives, one of the first things you should do is take the instrument and your child to your child's teacher, so they can check for proper fit. If the fit is not correct, then you can you have a chance to exchange your instrument before classes start.

Measuring properly for cello is a bit more difficult, and a bit more subjective. It is nearly impossible to measure properly without an instrument on hand. Generally, with the student seated in a chair and the instrument in the proper playing position with the peg about halfway out, the pegbox should be just about level with the student's ear. There is obviously some room for error here, and with cellos and basses it is very highly recommended that you work with your private teacher school teacher or music store to get the correct fit.

If your child is just starting out an orchestra, getting a properly sized instrument is something that's just too important to leave to chance . Make sure to work with your teacher and music store to get the properly sized instrument before you start. In that way your student can have the right equipment in hand to maximize their chances of success!


As you continue your internet research, here are some great resources regarding proper instrument sizing:

https://www.mencheymusic.com/wp-content/uploads/2020/04/2015_violin_sizing_chart-1.pdf

https://www.lashofviolins.com/useful-measurements.htm

https://www.violinist.com/blog/laurie/20138/14944/

https://www.stradviolin.com/rentals/measurings.html


Monday, June 22, 2020

Some information about Germantown Violin Co. student level violins

Some information about Germantown Violin Co. student level violins


What is a “student instrument?”

We often hear the phrase “student instruments.” What is that? What does that even mean? Often the term student instrument is used in opposition to “professional instrument” or “step-up instrument.” In general, a student level instrument is an instrument designed for someone just getting started as a musician, and/or an instrument that can be played as a student progresses through middle and high school. Obviously, the difference between a brand-new string player and someone who's played for five or six years can be pretty large, so the meaning of this term may not always be easy to understand. In our case, we use the term student instrument to describe instruments that are designed for beginners or players in their first and second year of playing.

Lots of choices!

When you do a Google search for student level violin you will find that there are a lot of instruments out there, and choosing an instrument for a beginning violinist or violist can be a daunting task. If you will indulge a small amount of self-promotion, I would like to take a small bit of time today to talk about the two instruments from Germantown Violin Co that are in the student level instrument category: the Wilhelm model 85 violin and viola, and the Gafiano model 105 violin and viola.

Fully carved construction.

These instruments are both fully carved instruments. That means that both the top and the back are made from one single piece of solid tonewood. This is a critical element of creating an instrument, as this single piece of wood is going to resonate much better than a laminate product will. Laminate construction definitely has its advantages: laminate is stronger and will tolerate getting beat up a little bit better than solid wood construction will. However, it is widely accepted that solid carved wood produces a much better tone than laminate construction. And after all, tone is what we're going for when we're trying to get new musicians off the ground.

The “Gafiano” instruments.

Let’s start with the model 105 Gafiano violin and viola. As I mentioned before, this is a fully carved instrument. This is a hand-built instrument with a hand-carved top and back. It is finished with a lightweight spirit varnish. Spirit varnish is lighter weight and allows the wood to resonate more freely. It allows the sound to project a little bit better. All the fittings on the model 105 instrument are solid ebony including the fingerboard and the pegs. Solid ebony adds a little bit of cost to the instrument, but it is absolutely vital to having an instrument that will last and perform for a long time. Many economy violins and violas have fingerboards made of pine or other white woods that have been painted to resemble ebony. These softer woods simply cannot tolerate the pressure from a player's fingers over time and will often warp and dent and make the instrument impossible to play correctly. Ebony is the standard material, and we make sure that all of our instruments have Ebony fingerboards. The pegs are also made of ebony and are custom cut to each individual instrument. It sometimes comes as a surprise to nonmusicians that pegs are not interchangeable between instruments. On a properly constructed string instrument, the shaft of each peg is tapered. This taper allows the peg to “lock” into the holes in the peg box and hold its tune. The holes in the peg box must be custom cut to fit the shape of the peg. Our luthier spends time on each instrument making making sure that the peg fit is perfect for each instrument.

The “Wilhelm” instruments.

The model 85 Wilhelm violin and viola are essentially the same as the Gafiano with two key differences: First, while the instrument is fully carved, it is more machine carved than hand carved. You still get all the advantages of a carved instrument, but the sound quality isn't quite as perfect as a hand carved instrument would be. Second, the 85 model has an oil-based varnish as opposed to a spirit based varnish. The advantage to an oil-based varnish on a student instrument is durability. The darker, reddish-brown lacquer finish tolerates bumps and dents more easily than a thinner spirit based varnish would. This makes the Wilhelm a perfect choice for fractional instruments designed for smaller players that are still learning how to handle the instrument properly. The oil-based varnish on the Wilhelm can tolerate these bumps and bruises more easily.

Set it up!

Finally, we need to talk about setup. All of our instruments are professionally setup here in the United States in our shop in Gaithersburg MD . This includes cutting and fitting of the bridge, shaping and fitting the pegs as mentioned above, and stringing the instrument with Preludes strings from D’Addario. The instruments are then test played an packed in lightweight cases with an accompanying brazilwood bow. Once the outfit is together it is ready to send off to your local music store for you to take a test drive!

We're extremely proud of our instruments. We take pride in selling instruments that, while affordable, are still genuine instruments that will help musicians from beginner to experienced along their musical journey. We invite you to visit our website at www.germantownviolinllc.com, or visit one of our local dealers where you can play the instruments in person. We are certain that you will be impressed with what you hear!


Tuesday, June 16, 2020

Now you can HEAR our Wilhem VLN-85 Violin!

We have been talking about our newest instrument, the Wilhelm VLN-85 violin and viola for the past several weeks across all of our platforms. Now you can have a chance to hear it played! Diana Traietta, an accomplished violinist, plays and discusses this wonderful instrument for beginners. It would also make a wonderful addition to any music store's rental inventory. Learn more here: germantownviolinllc.com

See the video here: VLN85 demonstration video